
How to automate your React Native deployment workflow using Bitrise
An important part of our workflow while building Prepd was deploying the app to our internal testers and stakeholders using Bitrise. This allowed us to involve them in design and product decisions and make sure that they were in the loop for every new feature we developed.
To accomplish this, we set up an automated deployment workflow that took care of creating a new build for every major update and uploading it to its respective distribution platform. Read on to understand how it saved us hours of work every day.
The beauty of Bitrise
Bitrise is a continuous integration/deployment platform. It offers a bunch of integrations to enhance your deployment workflow, like executing scripts, creating a build or sending Slack notifications.
A workflow in Bitrise is made up of a sequence of different steps
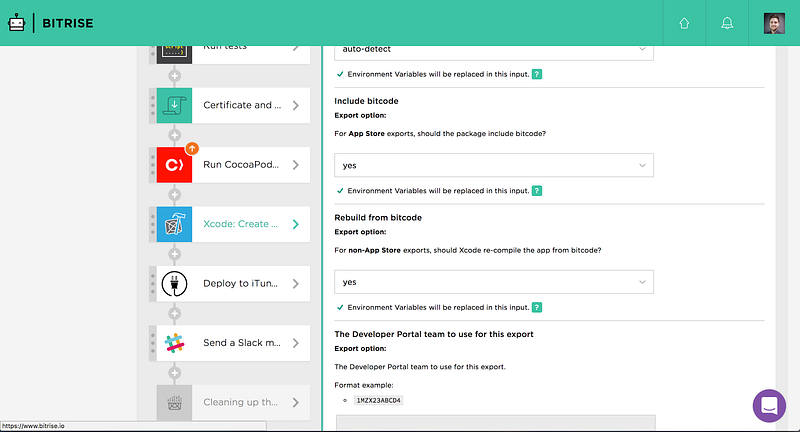
Our iOS workflow
To get a better understanding of how it works, let me show you our workflow for deploying an iOS beta release for internal testers using Bitrise. I’ll get into Android a bit later.
Every time we submitted a new commit to GitHub, a workflow with the following steps got triggered.
- Step 1 — Send a Slack message: sends a message to our Slack room to notify us about a new build being triggered.
- Step 2 — Clone our repository: clones the codebase from GitHub and makes it available to the deployment server.
- Step 3 — Install node dependencies: uses a custom script step to install the node dependencies for our app.
We used the config:envdump script to extract some third-party app keys to make them available as environment variables for the build process.#!/bin/bash npm install npm run config:envdump > .env - Step 4 — Install React Native: since we’re building a React Native app, we also had to install the corresponding CLI.
#!/bin/bash npm install -g react-native-cli - Step 5 — Certificate and profile installer: this step adds the certificates and provisioning profiles to our build.
- Step 6 — Install CocoaPods dependencies: installs CocoaPods modules for Intercom and Analytics which we added in the later stages of the project.
- Step 7 — Create an xCode Archive: uses the xCode CLI to create an xCode archive and export it as an IPA file on the deployment server.
- Step 8 — Deploy the app to iTunes Connect: takes the IPA file of the previous step and uploads it to iTunes Connect. Tadaa!
- Step 9 — Send a Slack message: again, Slack notifies us, but this time that the build has succeeded. Most importantly though, it also notified us if any of the previous steps had failed.
Sounds smart, doesn’t it? If you take all these into account, you’d probably spend 20–30 minutes for all these tasks to complete. In our case, that process ran in the background every time we pushed git commits to our release branches and generated a TestFlight build that users could immediately test on their devices.
The only extra step you have to take to also make it available to external testers (your larger beta group) is log in to iTunes Connect and select the new build to be published. You probably don’t want that to happen automatically until your internal testers have tested the app thoroughly.
Our Android workflow
This one is quite similar to iOS, except that we had to use GradleRunner to create a build file of the app. If you’re unfamiliar with Android, a build has the ending “APK” (as opposed to “IPA” for iOS).
So a different step was needed to build that APK file, and for the upload we replaced the iTunes Connect step with its equivalent for the Google Play store. Here’s the whole workflow, highlighting only the things that changed:
- Step 1 — Send a Slack message
- Step 2 — Clone our repository
- Step 3 — App signing: this script makes the Android Keystore available as a temporary file
#!/bin/bash curl $BITRISEIO_ANDROID_KEYSTORE_URL -o /tmp/prepd.keystore - Step 4 — Install node dependencies
- Step 5 — Install React Native
- Step 6 — Gradle Runner: a step for running Gradle Tasks that we used to generate a new APK for each release.
- Step 7 — Sign APK: in the case of Android, we need to sign the build after it has been generated.
- Step 8 — Google Play deploy: this step takes the APK file of the previous step and uploads it to Google Play, taking your store credentials as a JSON file. That file should ideally be in your repository as well.
- Step 9— Send a Slack success/failure notification
More automation, please
What’s convenient is that each workflow gets triggered by a different branch, so they run separately in chronological order. (you can also upgrade your plan if you want them to run simultaneously).
In our case, we used a deploy command to trigger the deploy for each platform, and that also bumped the version number each time we ran it. This is a requirements for both, iOS and Android so that your newly uploaded build doesn’t interfere with your last one.
"deploy":
  "npm run version:bump &&
   npm run version:tag &&
   npm run version:push"
This runs the following 3 scripts which in turn call a few automation scripts that I’ve linked to:
"version:bump":
  "node ./scripts/version-increment.js &&
   git add . &&
   node ./scripts/version-commit.js"
This increases the version number for the iOS and Android build, then adds the working tree and commits the new version with a tag representing the current release version.
  "version:tag":
    "node ./scripts/version-tag.js &&
     git push origin --tags"
This tags the current commit with the new version number and pushes the tags to the remote repo.
  "version:push":
    "git push origin `git rev-parse --abbrev-ref HEAD` &&
     git push origin `git rev-parse --abbrev-ref HEAD`:release-ios -f &&
     git push origin `git rev-parse --abbrev-ref HEAD`:release-android -f"
Pushes the new iOS and Android release to their corresponding branch. This is what triggers the above mentioned Bitrise workflows.
TestFairy vs. TestFlight The first tests we carried out for the app were deployed via TestFairy which also gave us access to detailed crash and usage reports as well as video recordings of crashes. Unfortunately, it was a major hassle to connect it to our Apple Enterprise account and our launch timeline forced us to switch to TestFlight, which is the default testing option for iOS, instead.
Our initial experience with TestFairy was very positive, though. There is a Bitrise step to deploy your app to it, and after your upload succeeds, the users you invited for testing receive a notification email with a download link to your app.
The main difference between the two platforms is that TestFlight has a limit of 2000 external users, but doesn’t require you to add the device UDID of every user. TestFairy on the other hand has no limit to the amount of testers you invite, but you need to either provide a UDID for each of them, or have access to an Apple Enterprise account which will allow you to circumvent the UDID requirement.
When you should use Bitrise
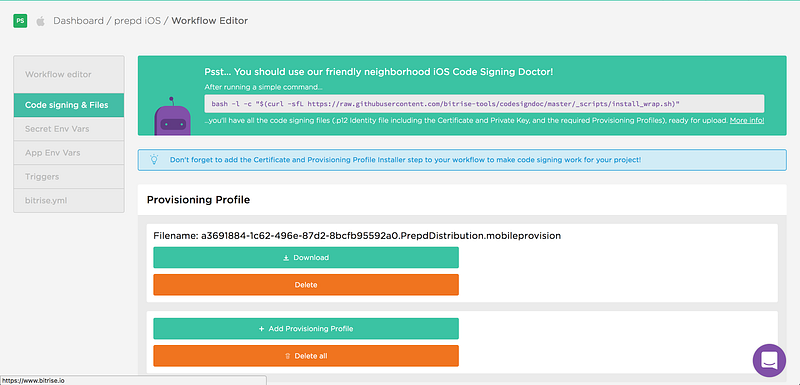
Bitrise provides a command line tool to help you generate the right provisioning profile and code signing file
Apart from the time you save with the automated build process (according to Bitrise that’s a total of 145,516 hours for all their customers), there are a few more advantages to using Bitrise, or any other deployment platform:
- Notifications: You’ll get notified when a build succeeds or fails, allowing you to react instantly if new unexpected issues come up
- Build logs: Bitrise gives you access to an extensive build log that you can use to track down errors. This has helped me a lot when new issues popped up and I needed to figure out what went wrong
- Easy code signing: Bitrise provides a command line tool to help you generate your code signing file and provisioning profiles for iOS. This is a real life-saver, because Apple made this unnecessarily complex.
Setting up a rock solid deployment workflow like this is a massive time and stress saver that I can’t recommend highly enough!
You might also be interested in a recent blog post by Bitrise which provides some statistics on the platform’s most popular integrations, the number of deploys that people made last year, and (surprise!) the most common issues with iOS Code Signing.
Originally published on Medium on February 6, 2017.