
Vibe Coding - Blessing or Curse?
Vibe Coding has been all the rage this year, and I’m ready to add my 2 cents. For the busy ones, here’s a TL;DR:
- Vibe Coding is a massive accelerator for Product Discovery, turning ideas into testable prototypes faster than ever.
- Left unchecked, it produces high technical debt, making it risky for direct use in production systems.
- With strong context engineering, small iterations, and clear separation between prototyping and delivery, Vibe Coding can meaningfully reduce waste and speed up real-world development.
So what is Vibe Coding again?
It’s your entrepreneurial ideas turned into deployable, functioning code within minutes! Imagine Pieter Levels as a Service, unlimited change requests included!
Here's another accurate description:

It’s obvious why such a practice would be wholeheartedly embraced by designers, serial entrepreneurs and product people: it removes the entry barrier to product development! No more need to partner up with an engineer if services like v0, Bolt, or loveable make building a web app as easy as—or even easier than— writing a Product Requirement Document.
It’s no surprise that such a practice would be frowned upon by many developers: it does their job—cheaper and more efficient! The main complaint though, is that it’s like building a house without a structure because the code it generates is unmaintainable, leading to an astronomical increase in tech debt over time.
"Vibe Coding may be a horrible, horrible idea from a maintenance standpoint, if you actually tried to make a product."
—Linus Torvalds at the Open Source Summit in Korea 2025
But LLMs are getting better every day at an unmatched, unprecedented pace. So the truth must lie somewhere in the middle. To understand how Vibe Coding really performs in real life across the SDLC, let me share a tale of my personal, slightly engineering-biased experience. For simplification purposes, I split the process into just two phases:
- Product Discovery
- Product Delivery
From 0 to 1: The Product Discovery Process
There’s definitely value in making a product idea interactive at a previously unattainable speed. The transformation from mental model to functioning prototype can reveal insights and flaws you wouldn’t otherwise gain from a static mockup. From my experience, in the discovery phase at least, it’s a significant process accelerator.
Ben Sufiani from Pirate Skills recently talked about this on the Produktwerker Podcast (German) where he explains that Vibe Coding an interactive prototype that you can ship to users is a real game-changer because it shifts the focus from technical feasibility to a deeper understanding of user needs, the problem that requires a solution, and the quality of the solution.

The six levels of the Builder Codex on pirateskills.com
In his Builder Codex, Ben helps non-technical people fill in all the gaps required to become a pro-viber: it not only teaches people how to build out their idea from 0 to 1, but also fills in the necessary steps to go from prototype to production (1 to 10), going as far as enabling builders to connect Stripe to their app and start charging users. If you’ve read The Mom Test, this should ring a bell: having people pay for your product is the best form of idea validation on your road towards Product Market Fit!
Reality check
While all of this sounds great, the reality may often be less impressive: while AI takes care of a lot of the initial heavy lifting, getting to the stage where you can charge money for a product is usually where the real challenges reveal themselves, and the part where you need to show substantial grit.
However, fast-tracking that initial “ideation gap” and getting to validation quickly can help you find reveal the uncomfortable truth much sooner and ultimately help you save a lot of time and money. Knowing whether you’re on to something and battle-testing an idea gives you the ability to try out even more ideas, and find the ones that may work after all in a much shorter timeframe.
In a nutshell, the idea is to build a lot, build it fast, and focus on where the traction is. In other words: Product goals outweigh Engineering quality.
Now on the second part…
From 1 to 10: The Product Delivery Process
One of the interesting aspects of Vibe Coding is that you arrive at the Product Delivery stage with most of your assets being available as code, rather than having to turn them into code first. Even if you’re not Vibe Coding, tools like Figma MCP can simplify this process considerably nowadays, turning layouts into code in a matter of seconds.
That’s great! But what does that code actually look like? From my experience with Vibe Coding tools, without much guidance, it more often than not resembles the architectural skills of a junior developer. While the UI may work as expected (which is the whole point of Vibe Coding) it may result in less-than-ideal engineering artifacts like giant god components, wildly mixed concerns, and an insurmountable inconsistency with your existing stack.
From throwaway code to reusable units
Reiterating what Pieter Levels does, it may work for a one-man show, but it’s usually not mature enough to fit into a larger codebase with multiple collaborators. Actually, if you regularly took this code directly into production without much oversight, your technical debt would quickly increase beyond control! In other words, Vibe Coding provides us with a ton of throwaway garbage code, and taking that from 1 to 10 requires a serious amount of additional effort:
- refactoring it into smaller units
- testing it for different edge cases
- integrating it into your custom backend
- verifying its sanity and security
- making it pass your pipeline
- documenting it for others
Looks like a long, unattainable list of tasks, especially for a Vibe Coder with little understanding of front-end technologies. So why not just do it properly from the start, given that you may actually spend the same amount of time refactoring the Vibe Code as if you were to start from scratch.
Recently, I faced this situation a couple of times and resisted the temptation to just throw everything away that my designer colleagues had done, as I saw an opportunity to actually reuse it, then understand which parts would need to be improved to make the code better align with our tech stack from the start.

A diamond going through different stages in the polishing process.
I realized that for isolated units of work that consist of and validate a single working feature, it works quite well. Keeping iterations small enough further supports the process of turning the Vibe coded raw material into polished diamonds.
Bridging the gap between 0-1 and 1-10
On many occasions, it might not make sense at all to further process any Vibe coded raw material, especially when the initial idea turns out to be bad.
On other occasions, especially when the prototype delivers solid results or is already based on a valid feature request, the option of polishing that raw code for production-readiness becomes more interesting.
Context Engineering
The biggest lever here is definitely context. Providing an LLM with context about your tech stack, your coding conventions and your best practices can make a huge difference in the level of pre-polish you can achieve with prompt engineering.
The goal is to address the emergence of technical debt sooner in the process.
If you're using Cursor (which is probably part of most engineers’ toolbelt nowadays), then you want to make sure to define elaborate rules. But if you use Vibe Coding tools like Bolt instead, you can also enrich your context with additional rules:
- Bolt allows you to define a system prompt via its "Knowledge" tab inside "Settings".
- v0 has a system prompt option named "Custom Instruction" under "Preferences".
- loveable allows you to paste in context if you enable the "Chat" feature.
Some of these tools provide the option to define a custom theme or link to an existing UI library. If you're able to adjust these to your needs, it can further help align with your stack.
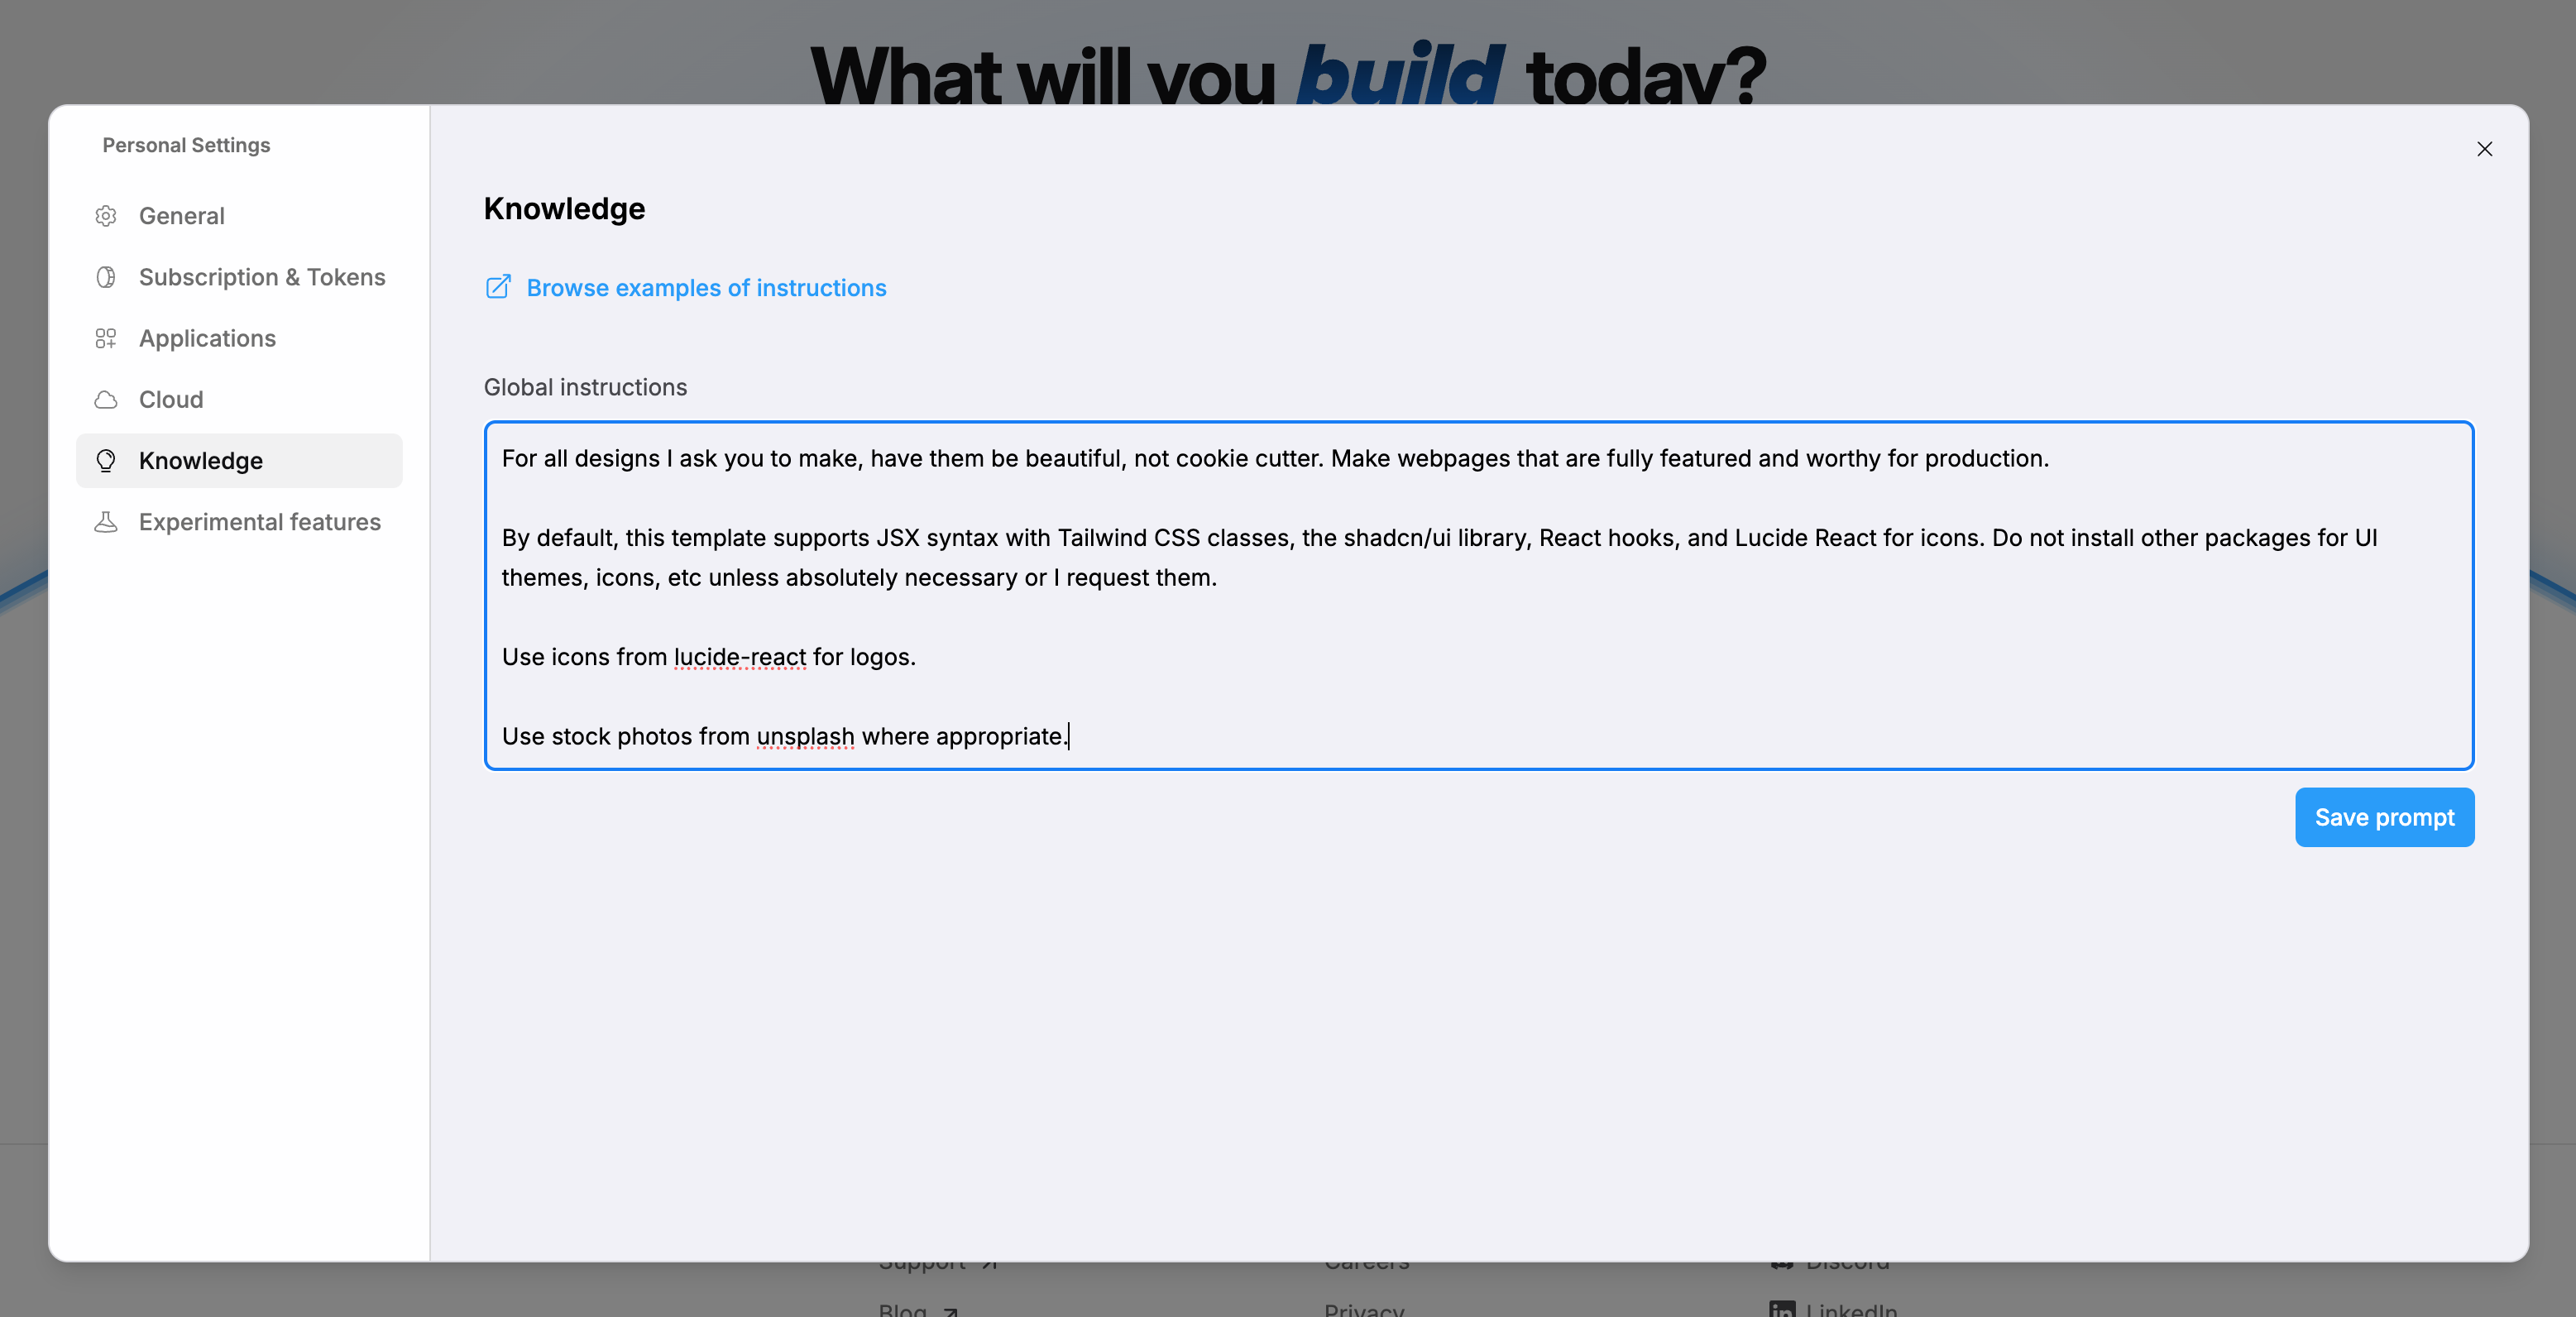
In Bolt settings, you can define a global system prompt using the "Knowledge" tab.
As for the global (system) prompt, here are some suggestions on what context to provide:
- Libraries of choice: React, Vue, and Svelte are difficult to refactor into one another, so make it clear which one you want to use. For visual consistency, tell it if you use a UI library like Radix, Tailwind or PrimeVue, or it will quickly go off-track.
- Coding Conventions: the more of these you can establish from the start, the better. So write good documentation. If your LLM knows what conventions to follow it will write code that's much more aligned with your current tech stack.
- Examples: ideally, your app already serves as a clean and organized boilerplate/template that your Vibe Coding tool can build on top of: like this, you not only nudge it in the right direction, but you also give it concrete examples on how new features should be built.
If you don't know where to start, take a look at the Github repository awesome-cursorrules which provides a ton of ready-to-use templates for all kinds of stacks.
Managing expectations
Last but not least, be aware that AI probably won’t write fully production-ready code, so make sure to set the right expectations for your team and stakeholders (you don't want your boss to think that you can ship a prototype to production!). There will inevitably be things left to do. But with the right prompts and instructions, you’re able to shift the balance of throwaway vs. reusable code in your favour.
Another thing that worked quite well for us is clearly separating the prototyping from the development environment, such that designers have a completely isolated playground to work with and show to clients, whereas developers can cherry-pick the reusable bits from the prototyping repository and gradually and carefully integrate them into the main app.
While there’s still a long way to travel from Vibe Coded prototypes to robust, battle-tested features, these tips should hopefully put you on the right path to minimise the tedious and repetitive human labour, and focus on the kind of tasks that really matter instead.
Closing thoughts
Vibe Coding is a powerful process accelerator in Product Discovery, turning weeks of uncertainty into hours of learning.
But it is not a silver bullet. The real advantage lies in knowing exactly where it fits in your process: optimizing for speed, learning early, and applying constraints and engineering rigor early on to align with our existing tech stack.
For purists, this shift is uncomfortable. It requires letting go of writing every line of code by hand. But our role evolves accordingly: from pure implementers to architects and reviewers.
Separating prototyping from production, investing in context engineering, and keeping iterations intentionally small, Vibe Coding becomes less of a trouble spot but can help reduce wasted effort, wasted assumptions, and wasted time building the wrong thing.
Additional resources